How to Fix a Cartridge That Won't Load (Beyond Blowing on It)
How do I get an old game cartridge to work again?
On this page
Why Blowing on Cartridges Actually Makes Things Worse
Be honest: the second your NES flashed that blinking gray screen, you yanked the cartridge out, pressed it to your lips, and gave it a good, confident puff. We all did it. It felt like a secret handshake every kid who grew up in the late '80s and early '90s just knew. And hey — half the time the game booted right up afterward, which only proved we were geniuses.
Except we weren't. Here's the uncomfortable truth: blowing on a cartridge does more harm than good. Your breath isn't dry air — it's warm and full of moisture (plus tiny specks of saliva, sorry). When that lands on the exposed metal contacts inside the cart, it speeds up corrosion and oxidation over time. You're essentially fogging up the very pins the console needs to read.
So why did it ever "work"? It wasn't the air at all. The magic was in removing and reinserting the cartridge. That second insertion reseated the connection and scraped off a little grime in the process. The puff was just a placebo with style.
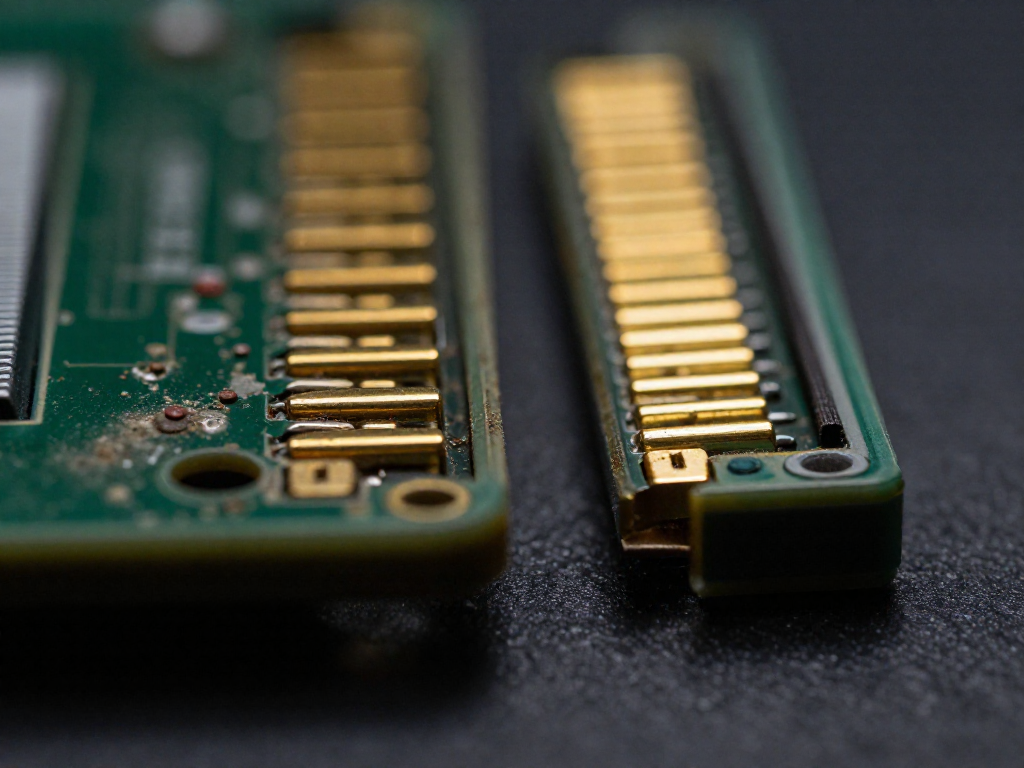
What's actually going on when a game won't load is simpler than it feels: the copper contacts on the cartridge — or the pins inside the console — are dirty, dusty, or lightly oxidized. The signal can't get through. Good news? That's a cheap, easy fix, and you don't need to ruin your retro treasures to do it.
What You'll Need (Cheap Supplies, No Special Tools)
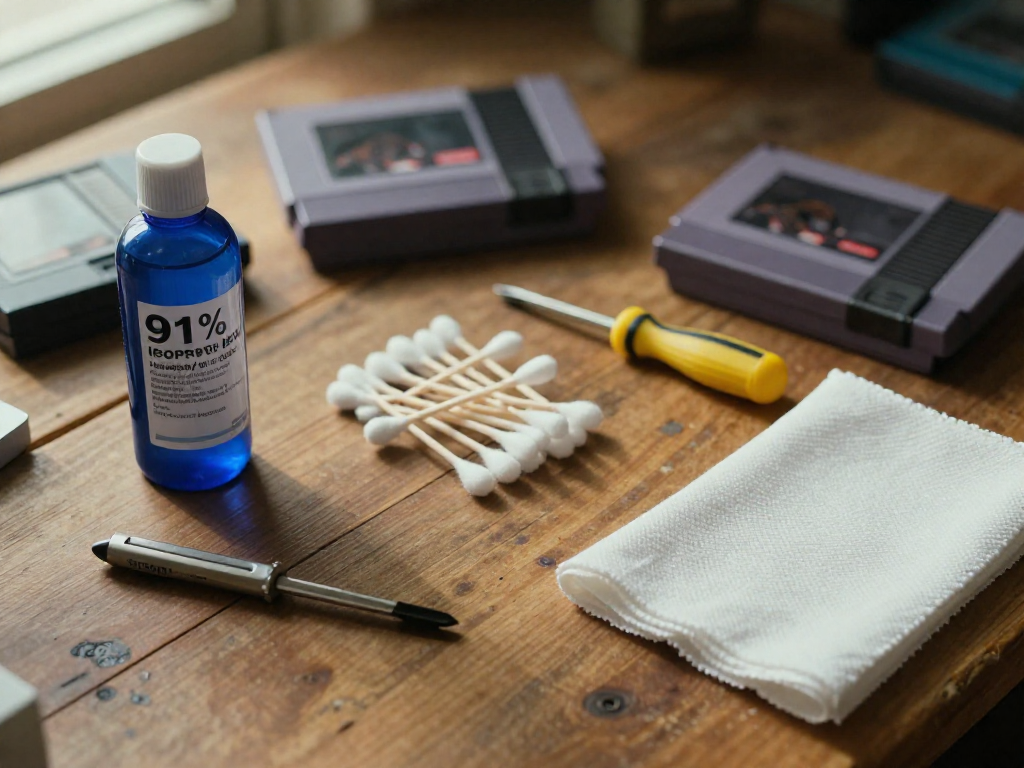
Good news: reviving a stubborn cartridge costs less than a fast-food combo, and you probably have half this stuff in a drawer already. Here's the short shopping list:
- 99% isopropyl alcohol — The hero of the whole operation. Get the 99% kind, not the 70% "rubbing alcohol" with added water and fragrances. A bottle runs about $5 at any pharmacy and lasts forever.
- Cotton swabs and a clean microfiber cloth — For scrubbing the contacts and wiping things dry. Plain Q-tips are fine; the lint-free kind are a nice bonus.
- A gamebit security screwdriver (optional) — Nintendo and Sega used oddball security screws to keep us out. A 3.8mm/4.5mm gamebit set is around $8 online and lets you crack the shell open for a deeper clean. Totally skippable for a basic fix.
- Brass or metal polish for heavy corrosion — Something like Brasso, used sparingly, can rescue badly oxidized contacts. A little goes a long way, so dab, don't drown.
What to skip: water, household cleaners like Windex, and abrasive paper or erasers. They leave residue, moisture, or scratches that make the problem worse, not better.
Step 1: The Quick Fixes Before You Clean Anything
Before you grab a single cotton swab, let's rule out the easy stuff. Half the time, that "dead" cartridge isn't dead at all — it's just not seated right or the console is the real culprit. Five minutes here can save you a whole cleaning session.
Run through these in order:
- Reseat the cartridge firmly. Pull it out, slide it back in with steady pressure, and try again. On the NES, resist the urge to slam the tray — just press it down with intent. A loose connection is the single most common reason a game won't boot.
- Clean the slot, not just the game. Dust and grime build up inside the console's cartridge slot too. A quick puff of compressed air (never your breath — moisture is the enemy) can clear it out.
- Test a known-good game. Pop in a cartridge you're sure works. If that one fails too, your problem is the console, not the game in your hands.
- Check the 72-pin connector. This is the classic NES weak spot. Those bent, worn pins cause the dreaded blinking screen, and a replacement connector runs about $8–$12 online — an easy, affordable swap.
If everything still looks grim after this, then it's time to clean. Onward.
Step 2: Cleaning the Cartridge Contacts the Right Way
Here's the part that actually fixes most "won't load" carts: cleaning those gold contacts. Decades of dust, oxidation, and yes, dried spit from all that blowing build up a thin film that blocks the connection. Good news — it costs almost nothing to fix.
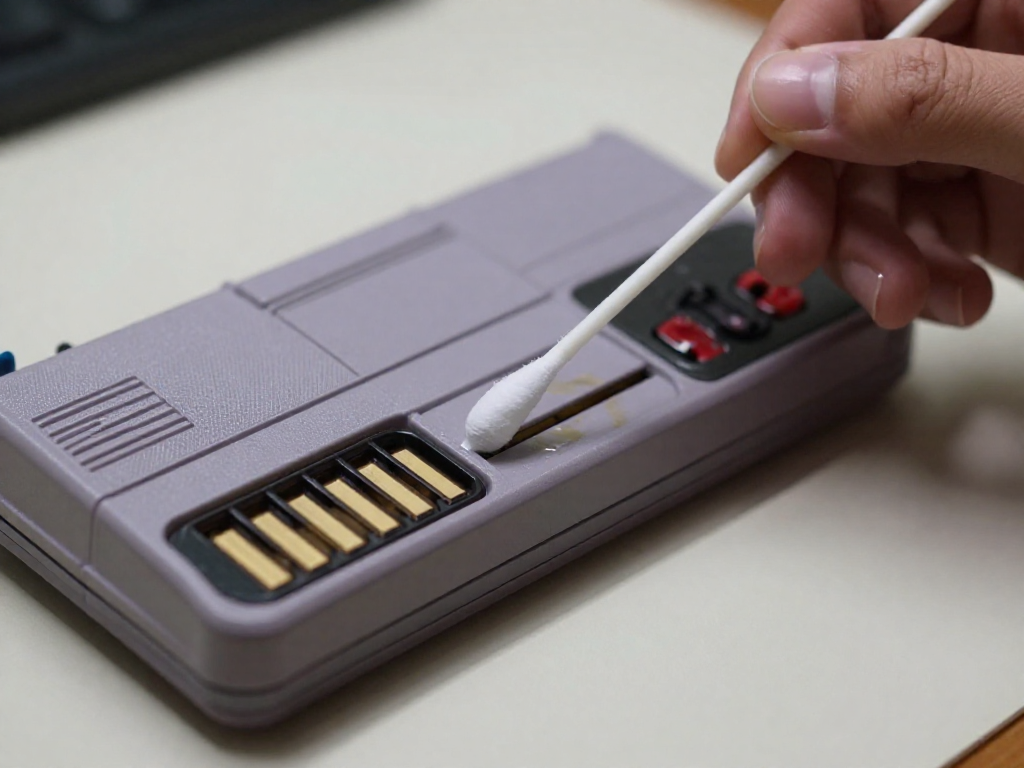
Grab a cotton swab and dampen it with isopropyl alcohol (90%+ if you can find it, usually around $3–5 a bottle at any drugstore). The keyword is dampen, not soak. You want it moist enough to lift grime, not dripping liquid down into the cartridge board.
Now wipe the gold edge connector in one direction, top to bottom, on both sides of the contacts. Don't scrub back and forth — that just smears the loosened gunk around. One firm, deliberate pass at a time. You'll probably be surprised at the brown or gray streak that shows up on a swab you thought was cleaning a "fine" game.
Keep going with fresh swabs until a clean one comes back clean. On a really neglected cart this might take four or five swabs. That's normal. Resist the urge to use a pencil eraser or sandpaper — both can strip the thin gold plating and leave you worse off than the dirt did.
Then the easy-to-skip step: let it dry completely before reinserting. Give it a few minutes. Alcohol evaporates fast, but powering on a damp cartridge is asking for trouble.
Want a deeper clean? Open it up
If wiping the outside doesn't do it, the contacts may be grimy where the swab can't reach. Most cartridges (NES, SNES, Genesis, N64) are held shut with security screws that need a gamebit — a little screwdriver bit you can grab online for around $6–10. Once it's open, you can clean both the contacts and the connector pins fully, and even soak just the contact board if needed. It's a five-minute job and the single biggest upgrade over surface cleaning.
Step 3: Tackling Stubborn Corrosion and Green Gunk
Sometimes a plain alcohol swab isn't enough, and you'll notice the swab keeps coming away dirty no matter how many passes you make. Take a close look at the contacts. Plain grime is brown or gray and wipes off easily. Oxidation is different: you'll see a dull, dark tarnish or, in the worst cases, a chalky green crust. That green is corrosion eating into the metal, and it needs a gentler, more patient approach.
Here's a beginner-safe method:
- Start with metal polish. A tiny dab of something like Brasso on a cotton swab, worked along the contacts, lifts tarnish that alcohol leaves behind. Go light—you're polishing, not scrubbing.
- Always follow with alcohol. Polish leaves an oily residue that attracts dust and can interfere with the connection. A clean isopropyl (90%+) swab afterward removes it completely.
- Buff carefully. A pencil eraser or very fine touch can knock off stubborn spots, but the contacts are coated in a thin gold-tone plating. Aggressive buffing wears right through it, and once that's gone you'll only have more corrosion problems down the road. If a few gentle passes don't help, stop.
When do you give up? If the contacts look pitted, flaky, or you can see bare, discolored metal where the plating used to be, that cart may simply be worn beyond saving. That's okay—replacement carts of common titles often run just a few dollars, so you're never stuck.
Console-Side Issues: When the Cart Isn't the Problem
Sometimes you scrub a cartridge spotless and still get nothing. That's your cue to suspect the console itself. On the NES (released in the US in 1985), the classic blinking power light usually means the 72-pin connector has lost its grip after decades of cartridges sliding in and out. The good news: it's a known, fixable problem.
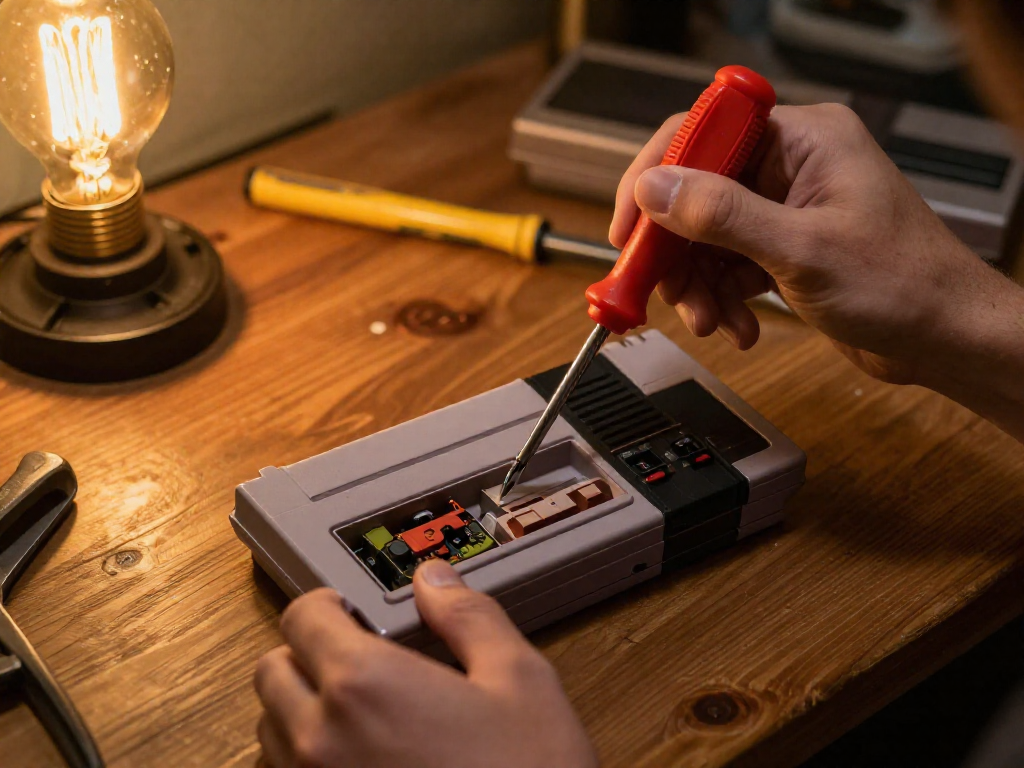
Start cheap. Pop the system open and clean the connector with a cotton swab and 91% isopropyl alcohol, working the contacts gently. If games still flicker, the spring tension is shot. You've got two routes:
- Drop-in replacement connector ($6–12 on eBay or Amazon). Easy and instant, but budget pins can wear out fast.
- Resurfacing the original by boiling it briefly or carefully bending the pins back. More effort, but it preserves the factory part.
Genesis (1989) and SNES (1991) rarely have connector issues since their carts don't bend the pins as harshly. For those, a swab of alcohol along the slot's contacts usually does the trick.
Before blaming any cartridge, give the console a quick check first—it's often the real culprit.
How to Keep Your Cartridges Working for Years
Once you've got a cart loading again, a little upkeep keeps it that way. The good news: prevention costs almost nothing.
- Store them upright. Stand cartridges vertically in a dry spot away from windows and radiators. Standing them like books keeps dust off the contacts and prevents warping from heat.
- Cover the open end. Slip on a dust sleeve or cap (cheap reproductions run a few dollars for a multipack). Even a snug zip-top bag works in a pinch.
- Do a light cleanup once or twice a year. A quick pass with a cotton swab and 90%+ isopropyl alcohol stops grime from building into the green corrosion that's a pain to remove later.
- And please, never blow on them. The moisture in your breath speeds up corrosion on those metal pins — the exact thing you're trying to avoid.
Treat your collection gently and these decades-old games will keep loading for decades more.
FAQ
Does blowing on a cartridge really damage it?
It's not the instant cartridge-killer the internet makes it out to be, but it doesn't help either. The moisture in your breath introduces a little humidity onto the metal contacts, which over many years can encourage corrosion. The reason blowing "worked" back in the day wasn't the air at all — it was simply reseating the cartridge a second time. So skip the spit and reach for a proper cleaning instead; your games will thank you in the long run.
What is the best thing to clean game cartridge contacts with?
A cotton swab (or lint-free cloth) dipped in 90%-or-higher isopropyl alcohol is the gold standard. Gently rub the gold contact strips until the swab comes away clean, then let the cartridge air dry fully before inserting it. For stubborn grime, a clean pencil eraser can buff the contacts, but wipe away the eraser dust with alcohol afterward. The whole kit costs just a few dollars at any drugstore, so this is a beginner-friendly fix you can do at the kitchen table.
Can I use regular rubbing alcohol on cartridge contacts?
You can in a pinch, but it's not ideal. The standard drugstore bottle is usually 70% isopropyl alcohol, which means it's 30% water — and water is exactly what you don't want lingering on metal contacts. Spring for the 90% or 91% (or higher) isopropyl alcohol instead; it cleans just as well and evaporates faster with far less moisture left behind. A bottle runs only a couple of dollars and lasts for dozens of cleanings.
Why does my NES screen blink when I insert a game?
That blinking power light and flashing screen is the classic NES handshake failure. The original Nintendo Entertainment System (released in the US in 1985) uses a front-loading slot with a spring-loaded connector called the 72-pin connector, and over the decades those pins lose their grip and collect dirt. First, clean the cartridge contacts with high-percentage isopropyl alcohol. If the blinking continues, the 72-pin connector itself is likely worn — replacements are inexpensive and swap in with a few screws, making it one of the most satisfying easy fixes in retro gaming.
How do I open a Nintendo cartridge without a special screwdriver?
Nintendo used a security screw called a 3.8mm (and sometimes 4.5mm) gamebit, which standard screwdrivers won't fit. The cleanest solution is a cheap gamebit set, often under $10 online. If you'd rather not wait, a common trick is to heat the end of a plastic pen barrel slightly, press it firmly into the screw head while it's still soft, let it cool, and use that as a makeshift bit. Go slow and don't force anything — you only need to open the shell, not fight it.
Is the green stuff on my cartridge contacts permanent?
Good news: it's almost never permanent. That green or bluish film is corrosion (often called verdigris) caused by moisture reacting with the metal over time, and it usually cleans right off. Use a cotton swab with 90%+ isopropyl alcohol, and for heavier buildup, gently buff with a soft eraser before a final alcohol wipe. As long as the corrosion hasn't eaten through the contact entirely — which is rare — your cartridge should read like new once it's clean and fully dry.
See also
- Beginner's guide to starting a retro game collection on a budget
- How to clean and maintain a vintage game console
- NES vs. SNES: which retro console should you collect first
- Where to safely buy authentic retro game cartridges
Related articles
Quick Reference: Retro Console Release Years and Lifespans
When did the major retro consoles launch and end? A scannable timeline of release years, lifespans, and console eras for collectors.
Jun 27, 2026 · 5 min read
The Atari 2600 at Home: A Beginner's Restoration Primer
Found a dusty Atari 2600? Learn gentle, beginner-friendly cleaning and basic fixes to revive your first vintage console—no soldering or big budget required.
Jun 27, 2026 · 12 min read
The Quietly Brilliant Tech of the Sony Trinitron, Explained
Why do retro gamers prize CRT TVs like the Sony Trinitron? Here's the clever tech inside, why it beats flat screens for retro play, and what to look for.
Jun 27, 2026 · 10 min read